
I initially posted my mum's vanilla pear jam recipe in 2017 as a pear preserve/jam because the option was to keep it chunky or to blend it smooth.
In time, I took the recipe to a whole new advanced flavor profile level by adding lime juice to it. It's a game changer!


Global Food Recipes
with Spices and Herbs
Free E-Book available for a limited time. Grab yours now and get instantly inspired!
You missed out!
Jump to:
TL;DR
The original recipe didn't include lime juice. We have been adding lemon or lime juice for a few years now to our French jam, marmalade, jellies and preserves because citrus fruits contain natural pectin and that helps to preserve your jam.
The ingredients are all natural in this recipe and the preparation is as per our French family recipes. That means the jam jars are NOT canned as per US tradition.
Instead, the jars are turned upside down to create a vacuum, then they are stored on a shelf until they are opened. Once opened, the jar has to be refrigerated and double-dipping is not permitted!

Ingredient Notes
- Pears — Use only fresh pears. We normally get William pears (known as the Bartlett variety in the US) as that's my, my mother's, and Paul's preferred choice. But, you can use other pear varieties too, such as Anjou or the French Butter pear variety. Get pears that are ripe, but not spoiled. The pears should NOT be hard, they should be soft to the touch because when they ripen at the right time, they are most flavorful and naturally sweet.
- Sugar — Normal all-purpose sugar. Sugar helps in preserving your jam for months. I do not recommend switching this ingredient with other sweeteners.
- Lime — Freshly squeezed lime juice AND the squeezed out lime halves. The lime halves will be added to the jam during the cooking process so to release the natural pectin in the skin (which helps to set).
- Vanilla Bean — Get the best quality of vanilla beans, like those from Madagascar or Reunion Island. Look out for untreated pesticide-free on the label because you don't want these harmful substances in your food.

Remember to select a pear that softens when cooked. Avoid pear varieties that hold their shape after boiling.
You can jazz things up with brown sugar instead of regular sugar.
Get untreated (no pesticides) lime, you don't want poison in your jam. You can use lemon juice too, but I think lime juice rounds up all the flavors. It's the missing link!
You can also use vanilla bean paste if you prefer, but don't use vanilla extract, it's just not the same flavor experience when used in this jam recipe. Besides, you want the small black vanilla specks to add aesthetics to your homemade jam.


Process Overview
Step 1
Peel and cut out the core of your pears.
Cut your pears into chunks and weigh them.


Step 2
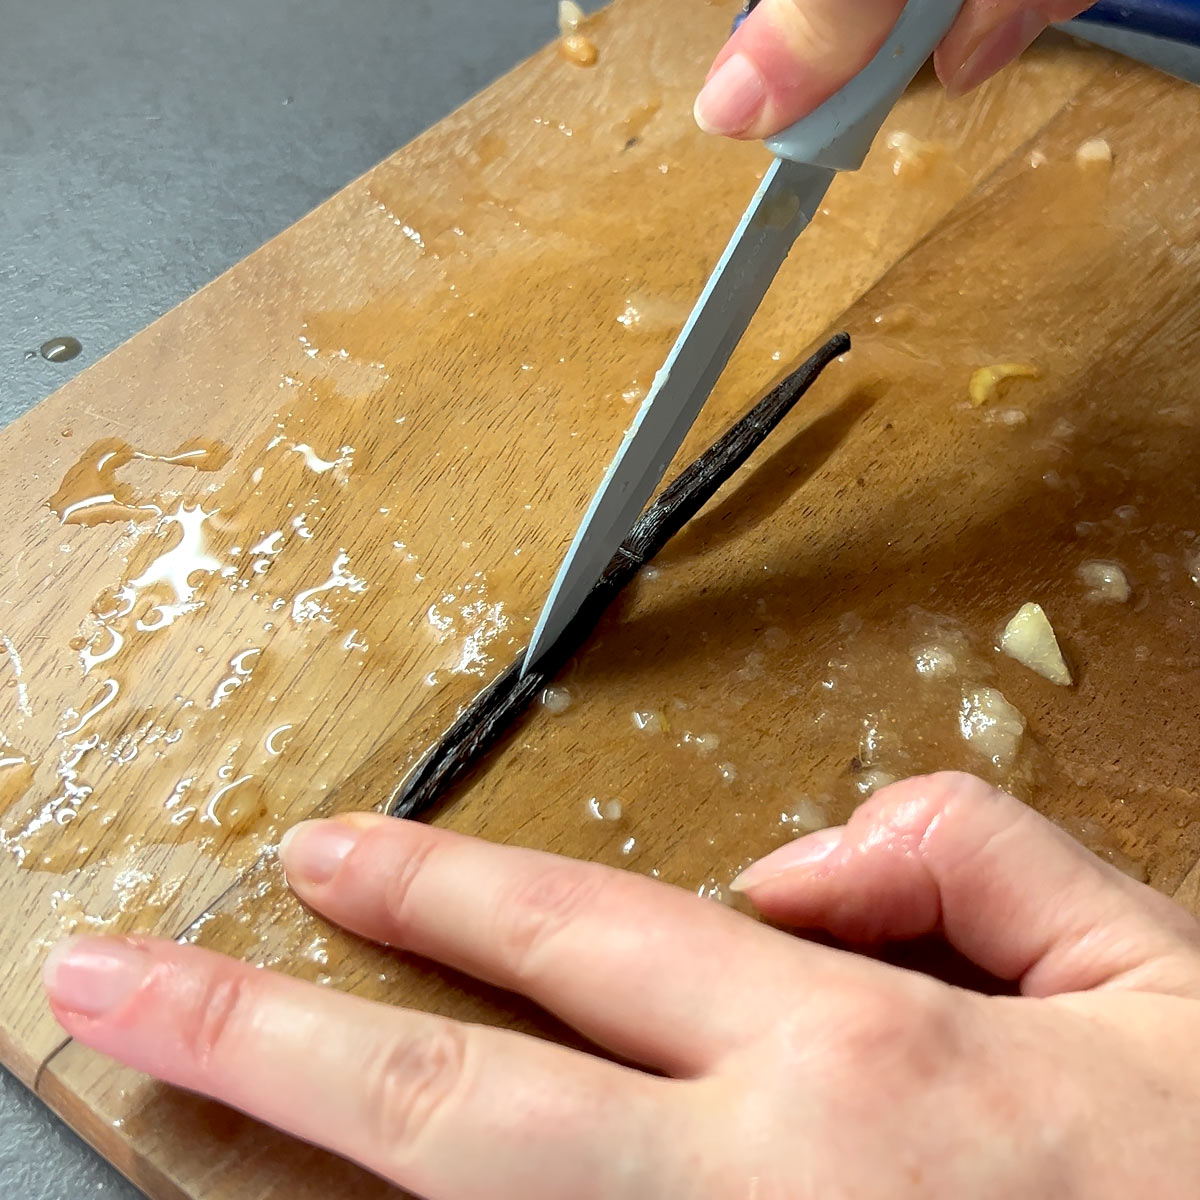
Slit open a vanilla bean lengthwise, scratch out the seeds.
Juice the Lime, but keep the lime halves!

Step 3
Place the pears in your jam pan with the sugar, vanilla bean, the squeezed out lime halves and the lime juice.
Mix it all well.


Step 4
Take the pot with the jam ingredients to the heat and bring to a rolling boil while stirring occasionally.


Step 5
Keep on the heat so that the jam can reduce over time and the pears cooked and infused with the vanilla lime flavors.

Step 6
When the pears appear darker, somewhat shiny and a bit translucent, after about 30–40 minutes or so simmering down, take out the vanilla bean and lime halves.
Blend them to your preferred consistency with a hand blender.


Step 7
Test if your jam is set, the thermometer setting temperature is 220 Fahrenheit/ 105 Celsius, or test by pouring hot jam on a cold plate to see if it's running.

Step 8
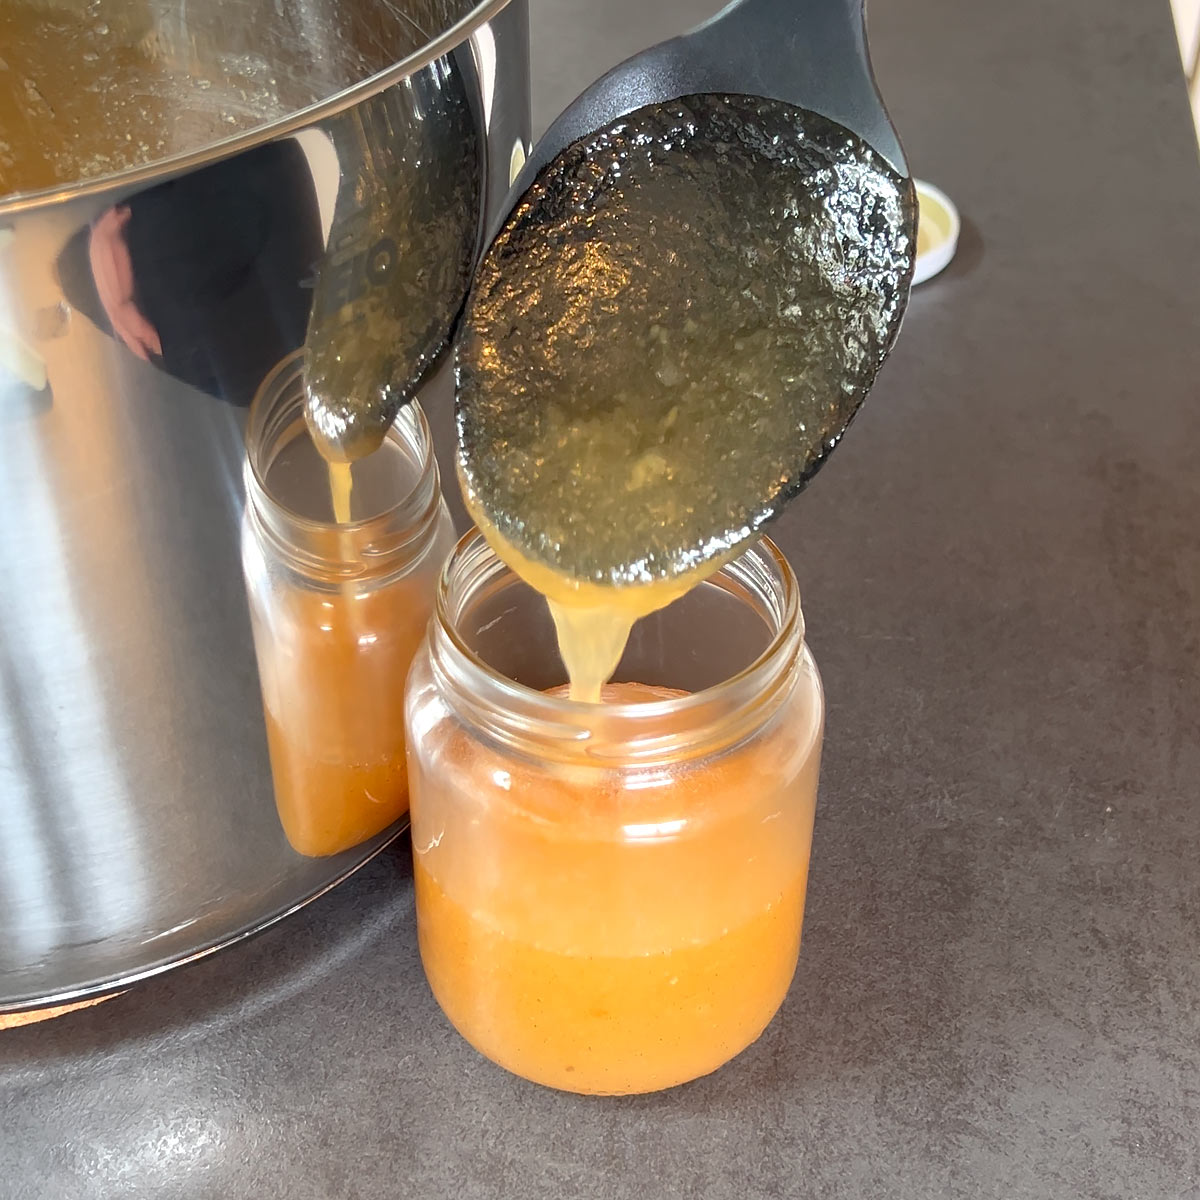
Pour hot jam up to the rim into clean sterilized jam jars. Close jam jars tight with lids.
Store or enjoy straightaway!

📖 Recipe

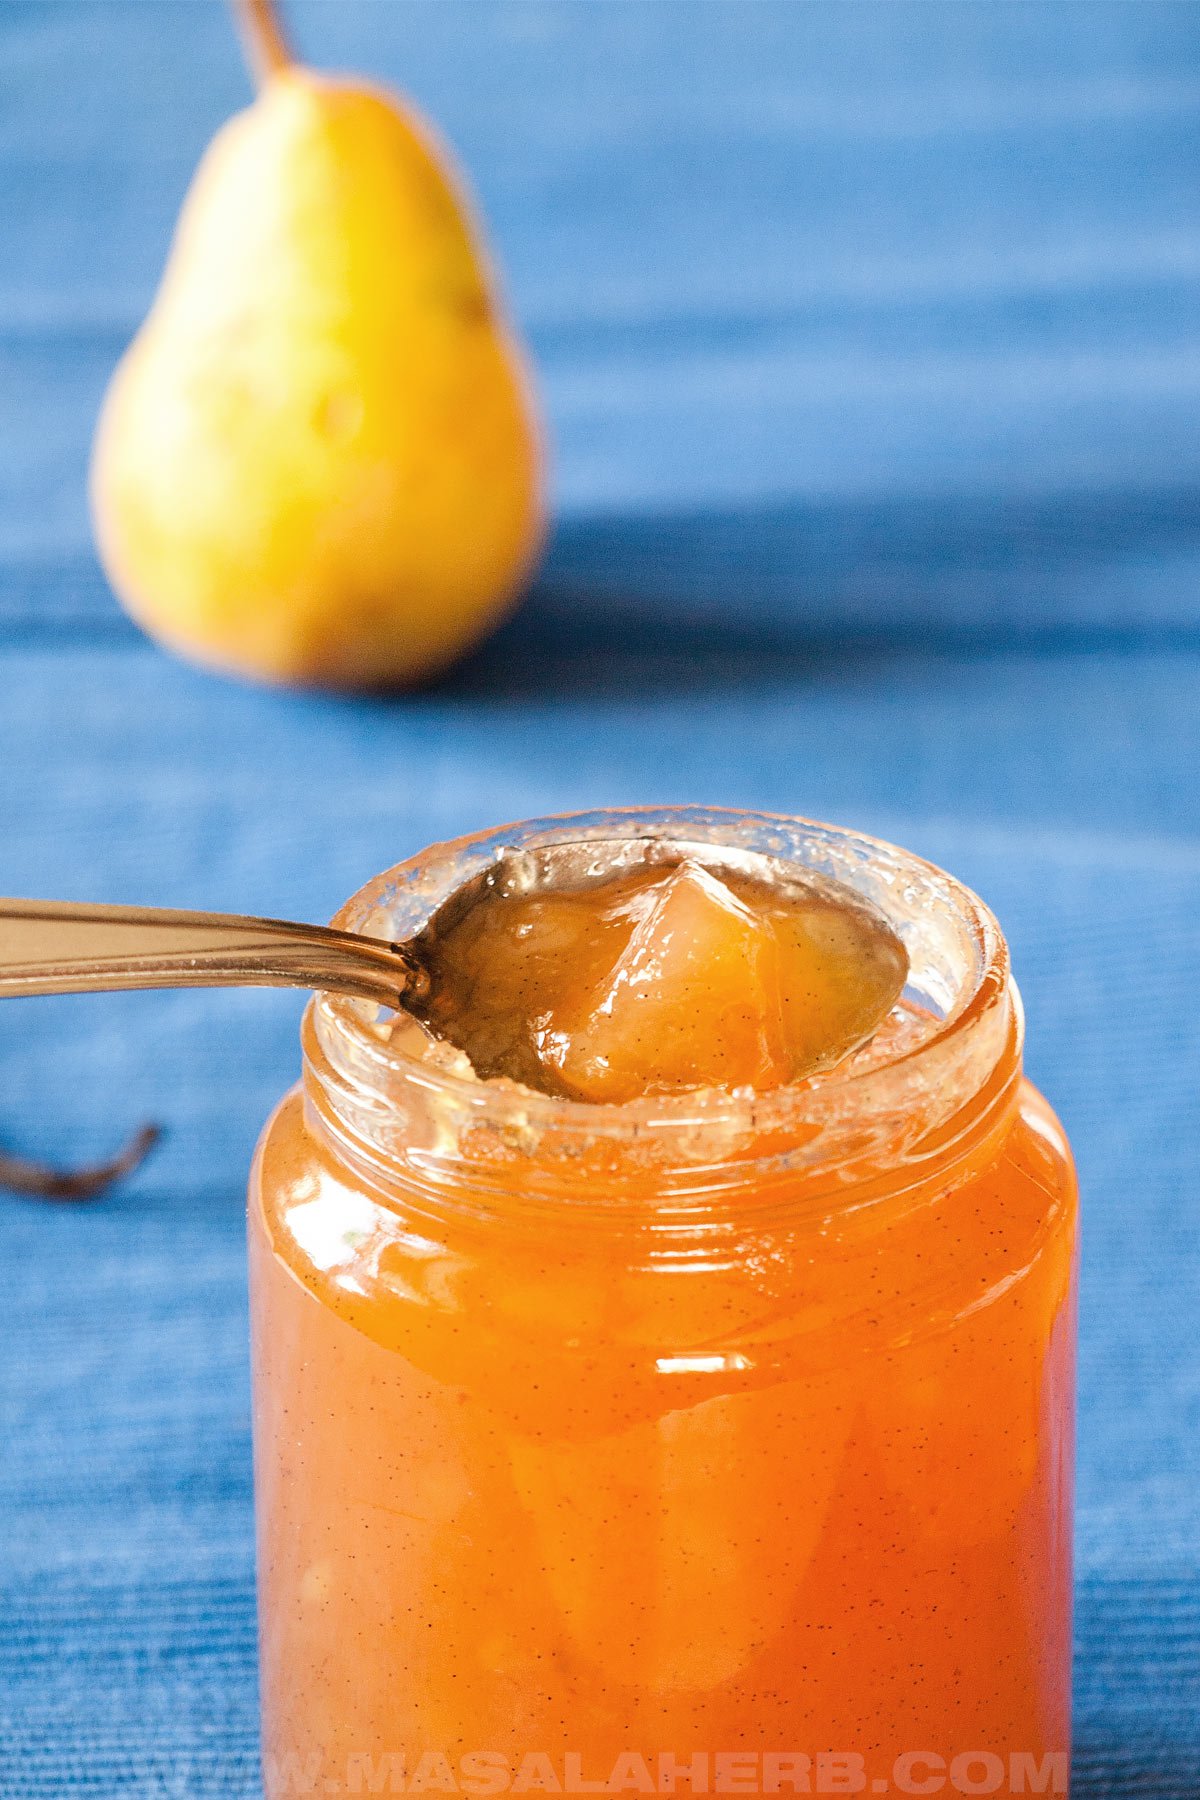
Vanilla Lime Pear Jam Recipe
Ingredients
- 2.2 Pounds Pears I use Williams (Bartlett) variety
- 1 Vanilla Bean
- 1 Lime
- 3 ½ cups Sugar
Instructions
- Peel, core, quarter and cut the pears into chunks.2.2 Pounds Pears
- Weigh your fruits.
- Slit open your vanilla bean. Cut your lime into two.1 Vanilla Bean, 1 Lime
- Place the pear chunks into a large jam cooking pot. Add to that the sugar, vanilla bean, squeezed out lime juice and 3 lime halves.3 ½ cups Sugar
- Keep the pot with the fruits on the stove over a medium-high heat setting. Bring to a rolling boil.
- Then take down the heat and continue to simmer over a medium heat setting for about 30-40 or so minutes. Stir occasionally.
- Keep cooking pear preserves until it has visibly reduced, changed to a darker color and appears glossy translucent.
- Pick out and discard the vanilla bean and two lime halves.
- Blend the jam to your desired consistency. If you keep it chunky it's a preserve, if you want to smooth, it's a jam.
- Test if the jam is set with a candy thermometer. The setting temperature is 210° Fahrenheit or 105° Celsius. Or drop some of the preserve on an ice-cold plate or spoon and if it's not running, it is set. If it runs, keep the jam for some more time to cook on low heat and repeat the test until you have the correct consistency. Keep in mind that jam will always appear liquid when cooking hot.
- Pour hot jam into clean sterilized jars and fill up to the rim.
- Close the jar well with the lid, clean if you made a mess and turn upside down to create a vacuum.
- Allow the jam to cool down to room temperature, turn it back up, label and store in a cool and dry place or use straightaway.
Equipment
- Jam Pan (copper) or large stainless steel pan
- Silicone Spatula To help you scrape out all the jam from the pan
- 4 8 oz Canning Jars (8oz = about 230 ml)
- Wide Mouth Funnel Optional, makes it easier to pour jam into jars.
- Wettex Absorbent Sponge To clean jars if you made a mess.
Nutrition
Essential Jam-Making Know-How
Only use healthy fruit pieces, never decaying fruit pieces. Cut spoiled fruit pieces away, as they can reduce the shelf life of your jam.
You can choose to leave the pears to macerate with the sugar and vanilla bean overnight. That means you prepare, clean, and cut your pears and combine them with the sugar, slit open vanilla bean, and lime juice in your jam pan overnight. The next morning, you take it all to the heat to cook down your jam. Macerating helps to release quality fruit flavors.
Don't reduce the sugar quantity because the sugar helps in preserving the jam, and, besides, you will only eat a teaspoon of jam at a time with bread or in yogurt. Nonetheless, if you prepare a small batch of pear preserves and you intend to eat it soon, you can reduce the sugar in the recipe.
In France, we use a large copper jam pan to cook our jams. Copper is a better heat transmitter, and the jams turn out better cooked in it. Alternatively, we also use large stainless-steel pots.

Bring it initially to a rolling boil and reduce it to a simmer so that you can better control the cooking process.
The fruits are done when they are cooked and appear shiny, glossy, and almost translucent. That's a sign that your jam is ready, and then you can take out the vanilla bean and blend the jam to test the setting afterward.
A hot jam will always appear more liquid. Its true consistency only shows when it cools down.
Test the setting by using a candy thermometer. The setting temperature is 220 Fahrenheit/ 105 Celsius. I use the ice-cold testing technique, where a drop of hot jam is placed on the ice-cold plate, cooling it down instantly to reveal the true consistency. Moving around the plate, the jam either runs or doesn't, and if it's the latter, it's set.
A jam that is not set is easier to fix because you can just leave it further to cook down until it's done and set. A jam that is cooked too much will get hard when cooled and can't be fixed that well.
If your jam was cooked too much and hardened when cooled, take it back to the heat with a small quantity of water mixed in and briefly cook it for a few minutes. Put it back into clean jars and refrigerate. This jam won't hold that long at room temperature because you had to add water to fix the jam, but at least you can still enjoy it.

Use only clean, sterilized jars and lids. Scrub them well with soap and water, and sterilize jars + lids in a hot water bath or in your dishwasher at a higher temperature.
You can add a few drops of a distilled, clear, consumable spirit to your inner lids to kill all remaining germs before closing the jar with the lid.
Placing the tightly closed jam jar upside down, right after filling it with jam, is a technique to create a vacuum. This in turn prolongs the shelf-life of the jam. Turn it back up once the jam is lukewarm so that no air bubbles form at the bottom of the jar.
While we do not water-bath can our jam jars in France (we only do it for canned sugar syrup fruits and the like), you are still free to do that. I have put together a general post with water bath canning instructions.
Storing
Once you fill up your jar with jam, close it tight with a lid, clean the jar with a sponge, and turn it upside down.
Wait for the jam to cool, and when it is at room temperature, turn it back up so that no air bubbles get trapped at the bottom of the jar.
Then store your pear jam jars on a shelf, away from direct sunlight, heat, and humidity. They are good for 10–12 months unopened (having followed all cleanliness precautions).
Once you open your jar, store them in your fridge.
Never double dip and always use clean spoons when dipping into your jam to avoid mold growth.
Ideas to Use Your Pear Jam
Generally speaking, we primarily use jams as bread spreads in Europe. Baguette, whole wheat bread slices, Brioche, Kaiser Semmel buns, you name it. This is essentially our breakfast.
Then, we also use jams as a pastry or cake filling. Think puff pastry cream cheese pockets, donut fillings, or a cake can have a layer of jam too (which is a Torte glazing technique from the Austrian national cuisine).
At home, people add a teaspoon or two to their plain yogurts to flavor them instead of adding sugar. I recommend making French yogurt at home and adding this pear jam to it, it's a game changer!
I, personally, love my pear like vanilla jam mixed into freshly cooked plain porridge. If you feel adventurous, try a Scandinavian rice porridge with this fruity jam.
More Fall/Winter Preserves
