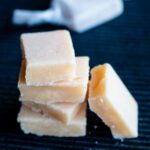

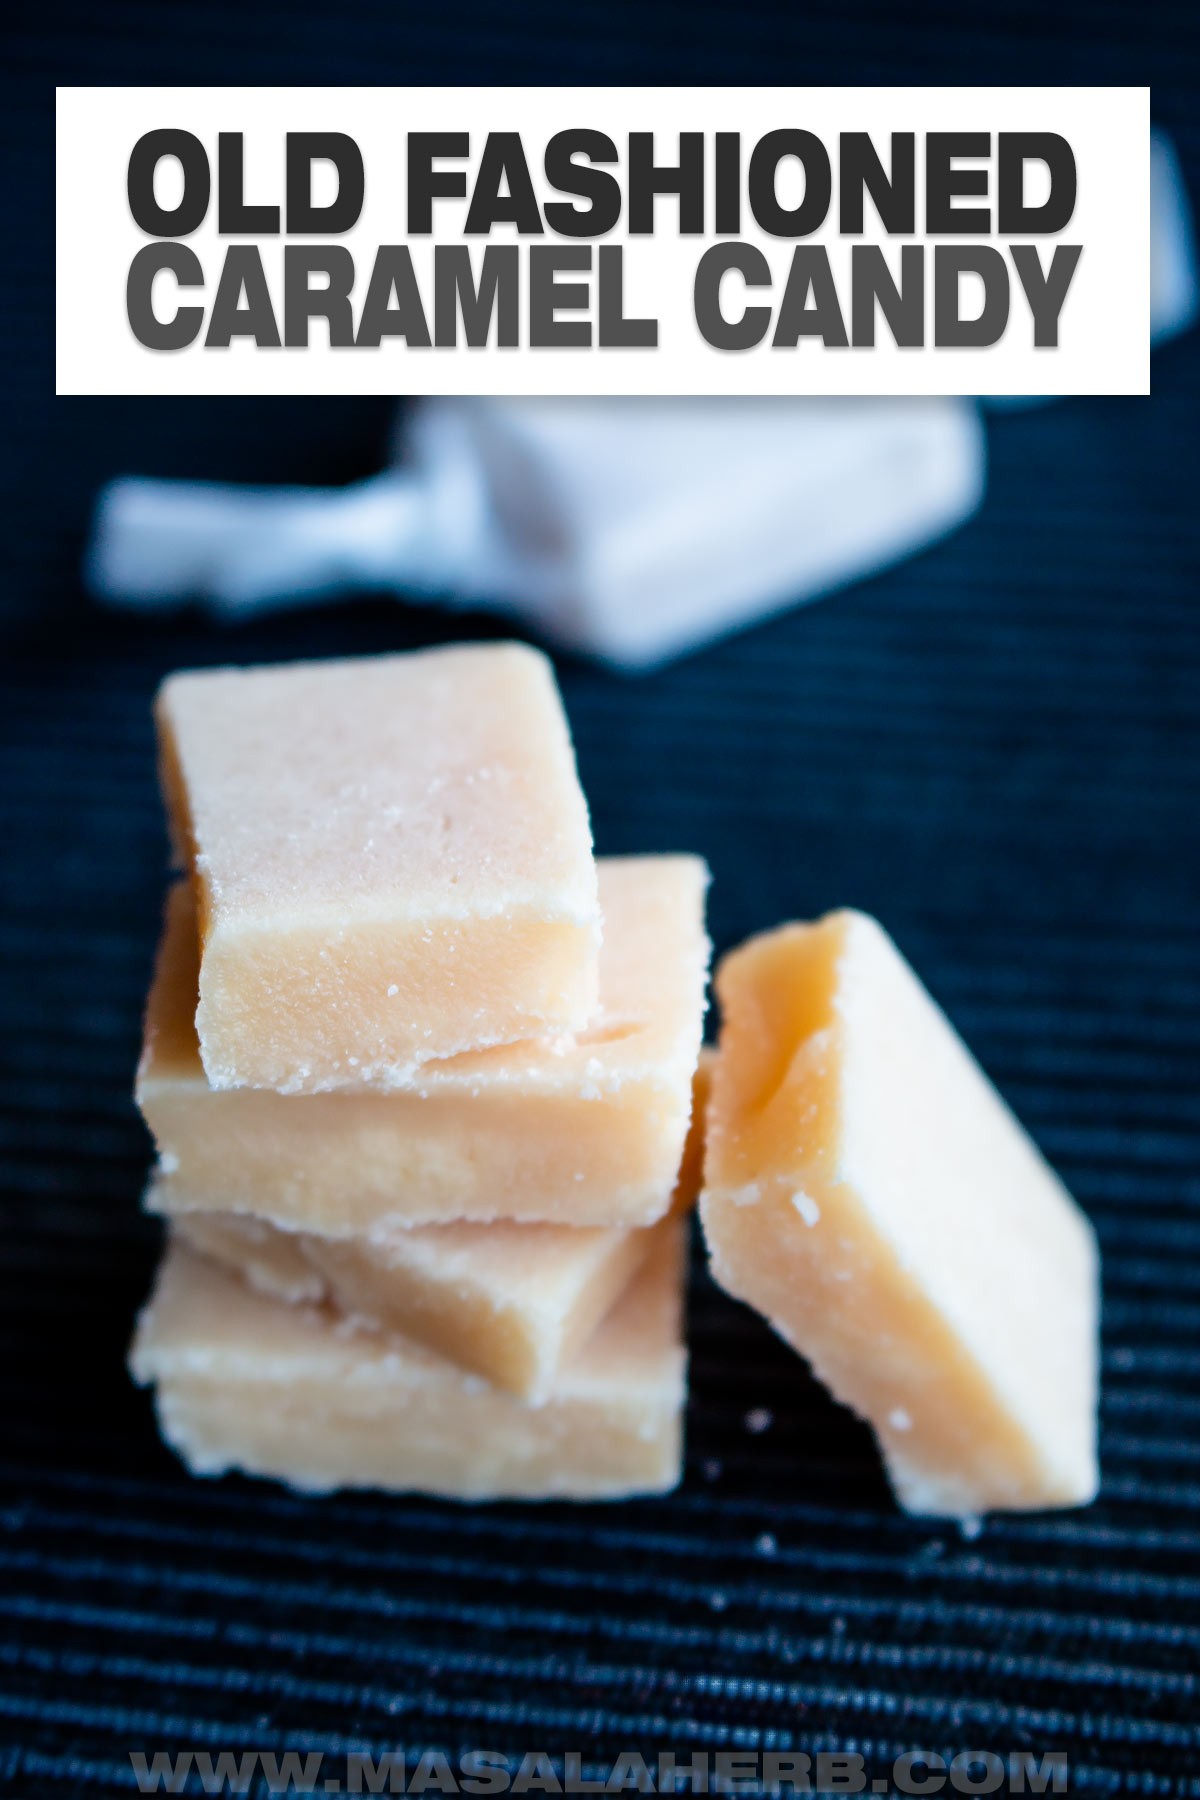
Old-fashioned hard caramel candy prepared with only 2 ingredients (yep, I'm serious!)
My grandmother used to make these for my dad when he was small, and now I'm sharing it with you.

Global Food Recipes
with Spices and Herbs
Free E-Book available for a limited time. Grab yours now and get instantly inspired!
You missed out!
TL;DR
My grandmother in Austria used to make these 2 ingredients caramel hard candy back in the day when my father was a kid.
Most of my dad's family made them for Christmas, and so my dad's cousin was able to retrieve the old-fashioned recipe.
The caramel is made from scratch with only milk and sugar.
This was a candy which they made when the second world war ended in rural Austria, and it was considered a real special treat back then.
The recipe was handed down by a neighbor lady to my folks, hence why it's called caramel from Sammerin (that was the ladies' family name).
Process Overview
Step 1
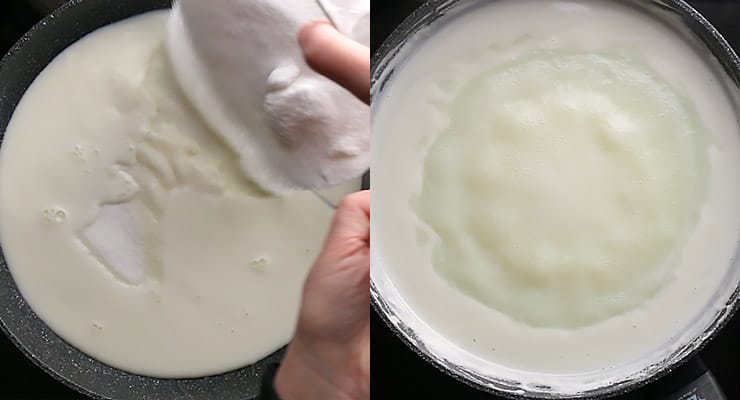
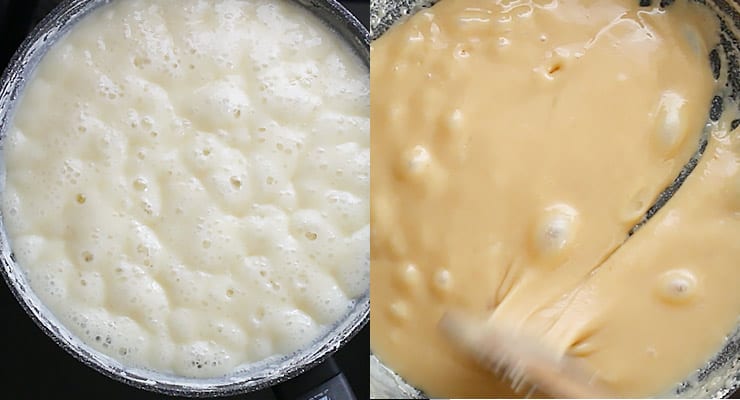
Place milk and sugar into a pan and heat up.
Stir continuously over a steady heat and bring to a rolling boil.
Step 2
Over time it will reduce, but it will take at least 30 to 40 minutes. At the last stage, the caramel will thicken and turn brown.
Just keep on stirring until you are satisfied with the color and consistency.
Step 3
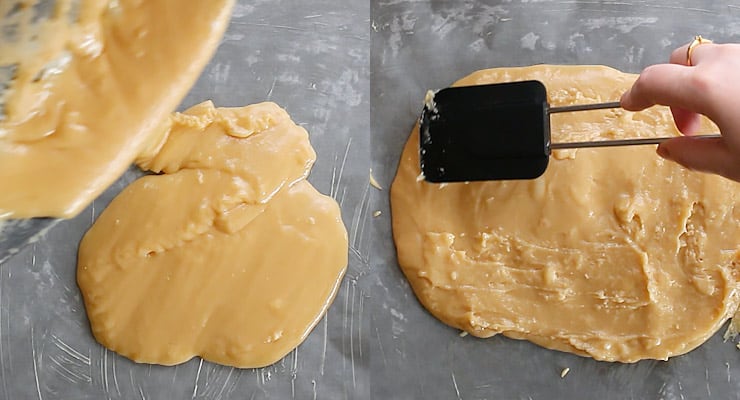
Pour the thick caramel quickly without wasting time on a buttered parchment-lined sheet pan.
Spread out the caramel.
Step 4
You need to work fast because caramel thickens quickly the moment it is taken from the heat, and you need to be careful because it's super hot.
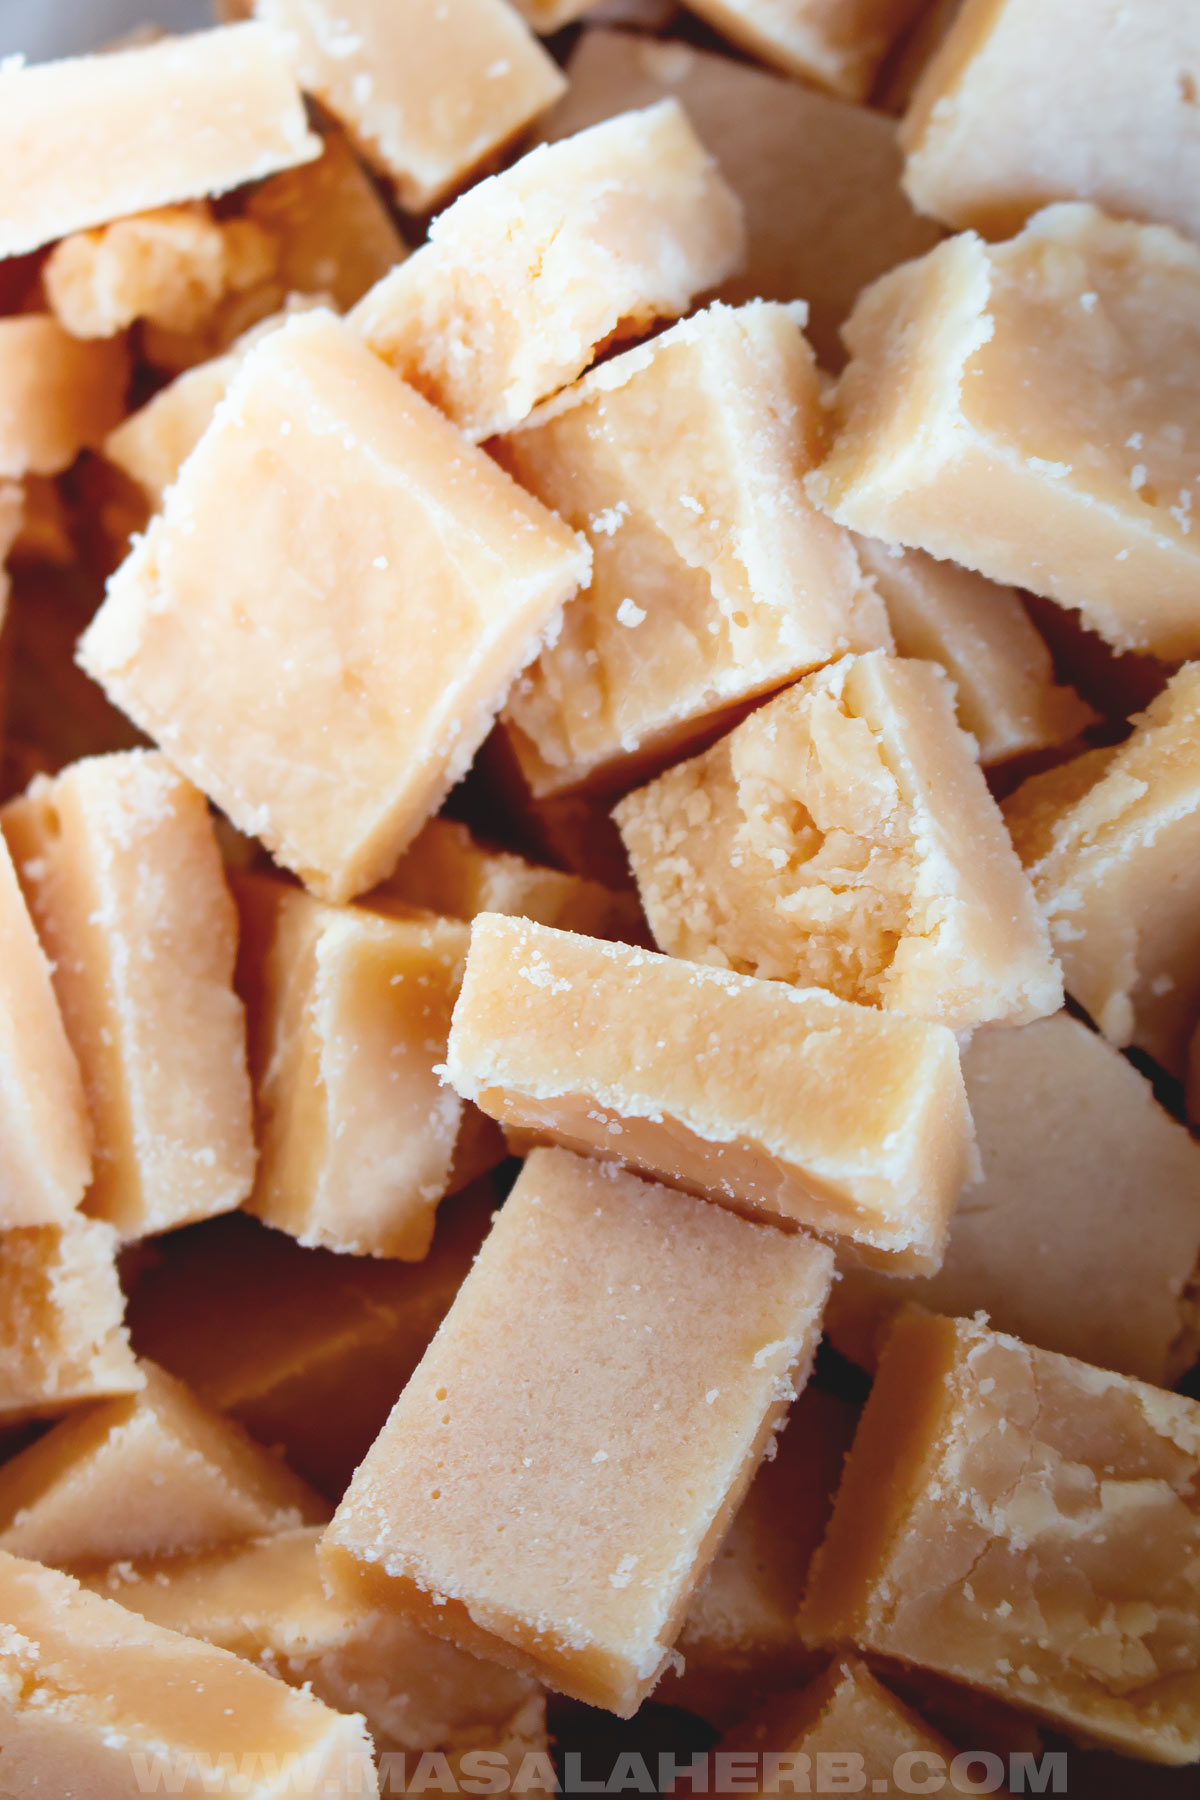
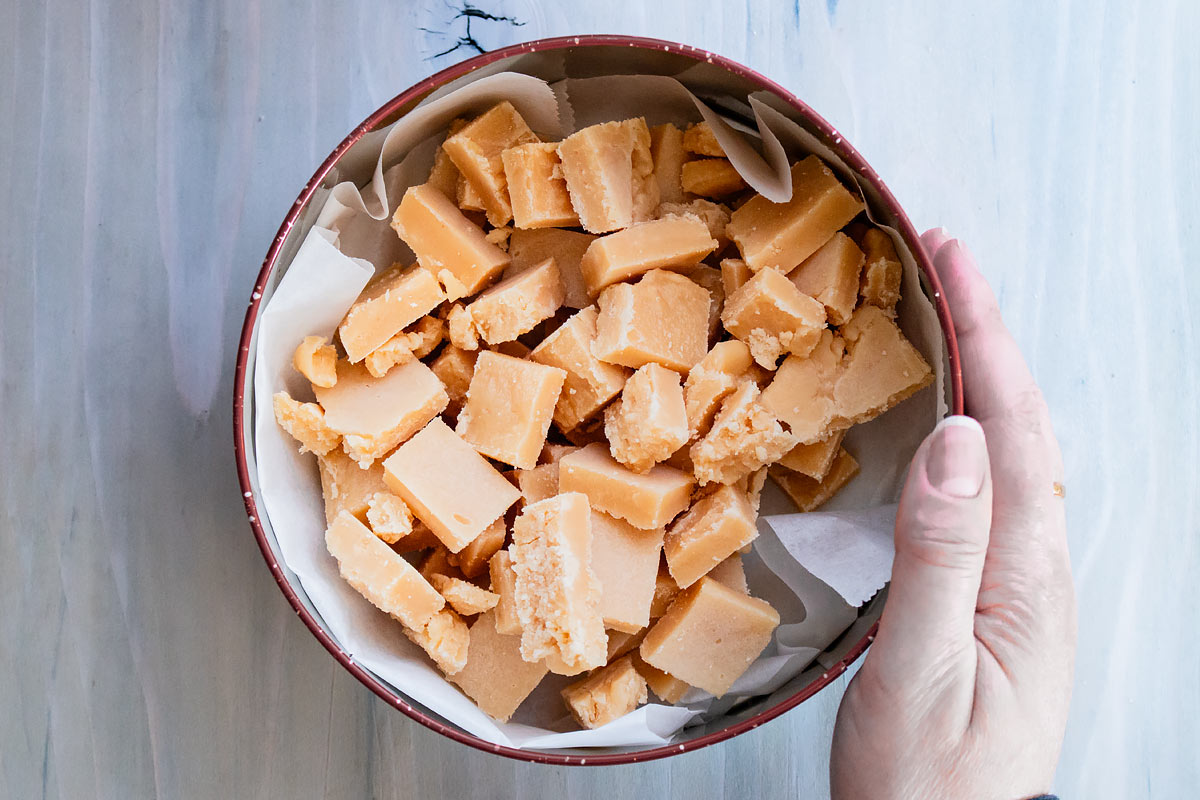
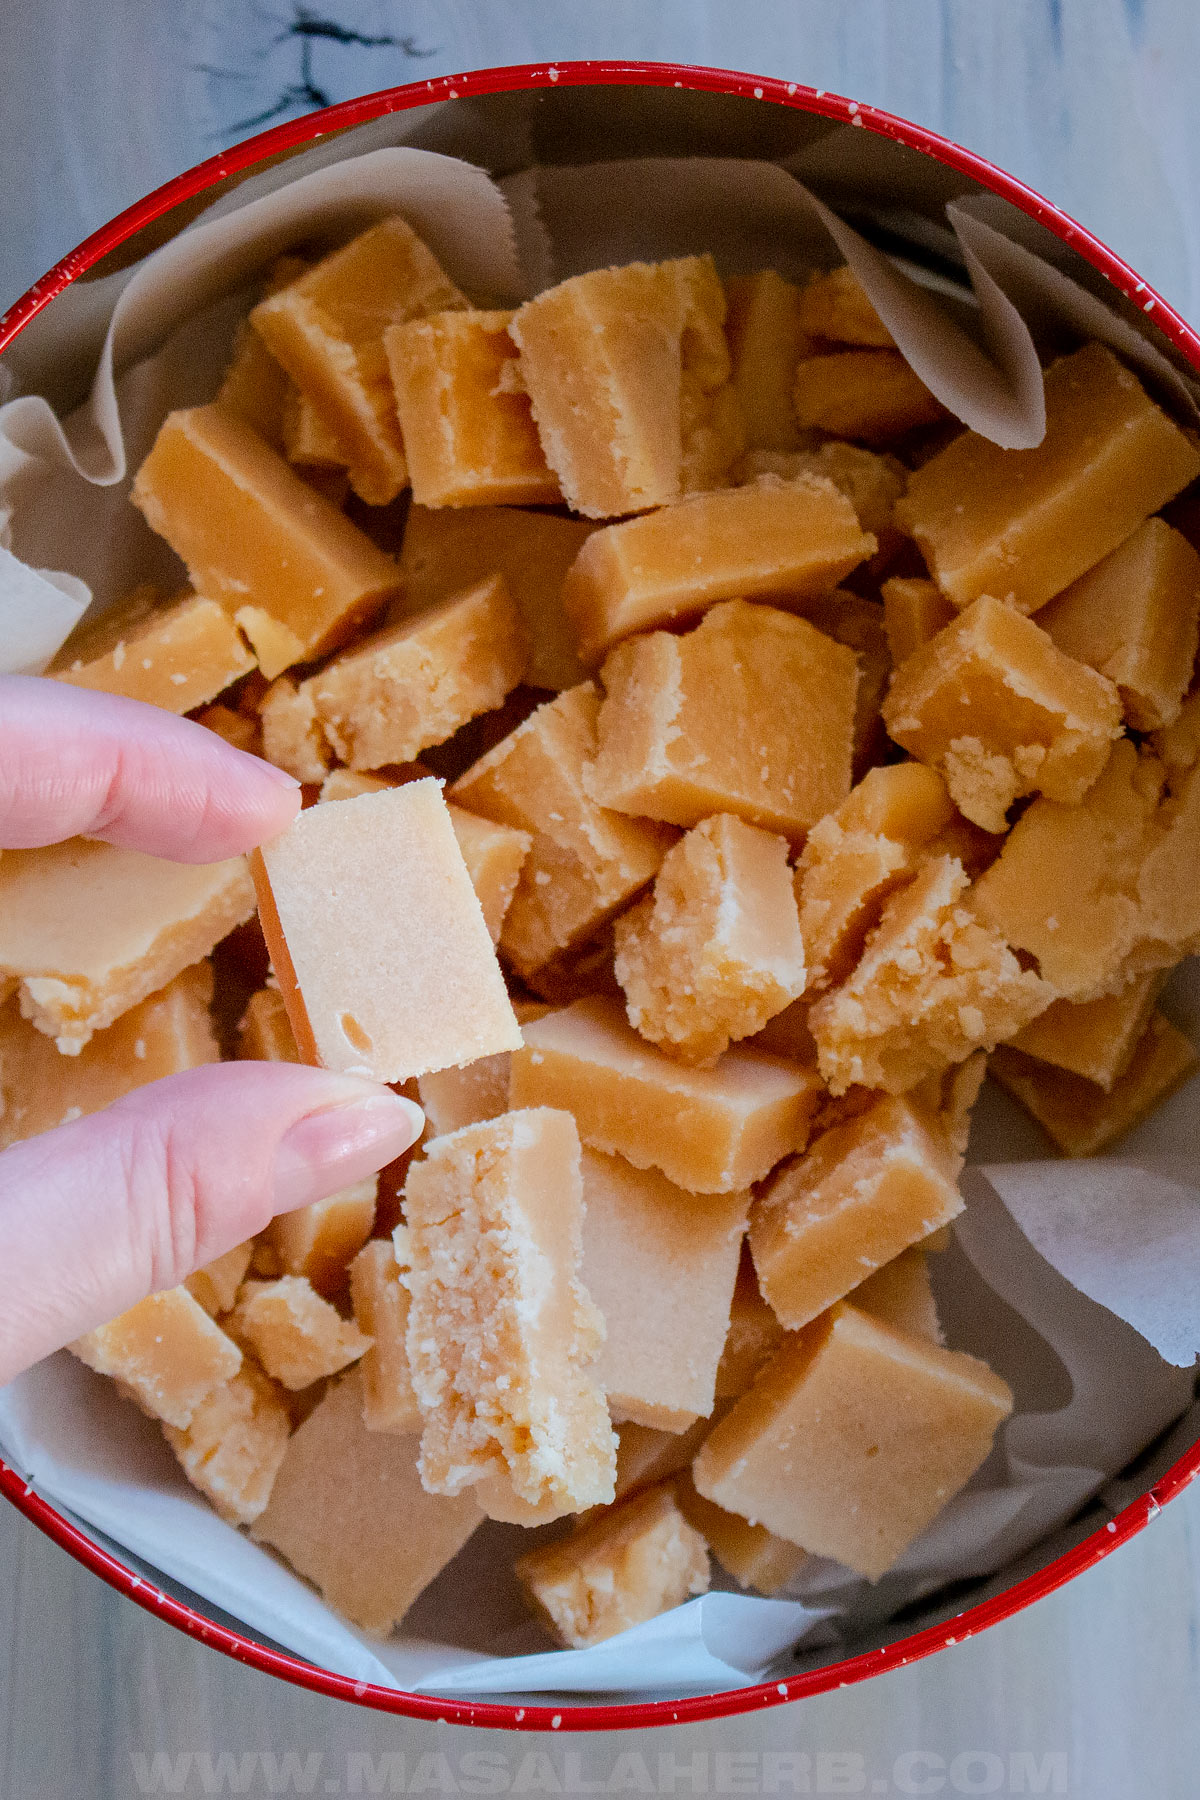
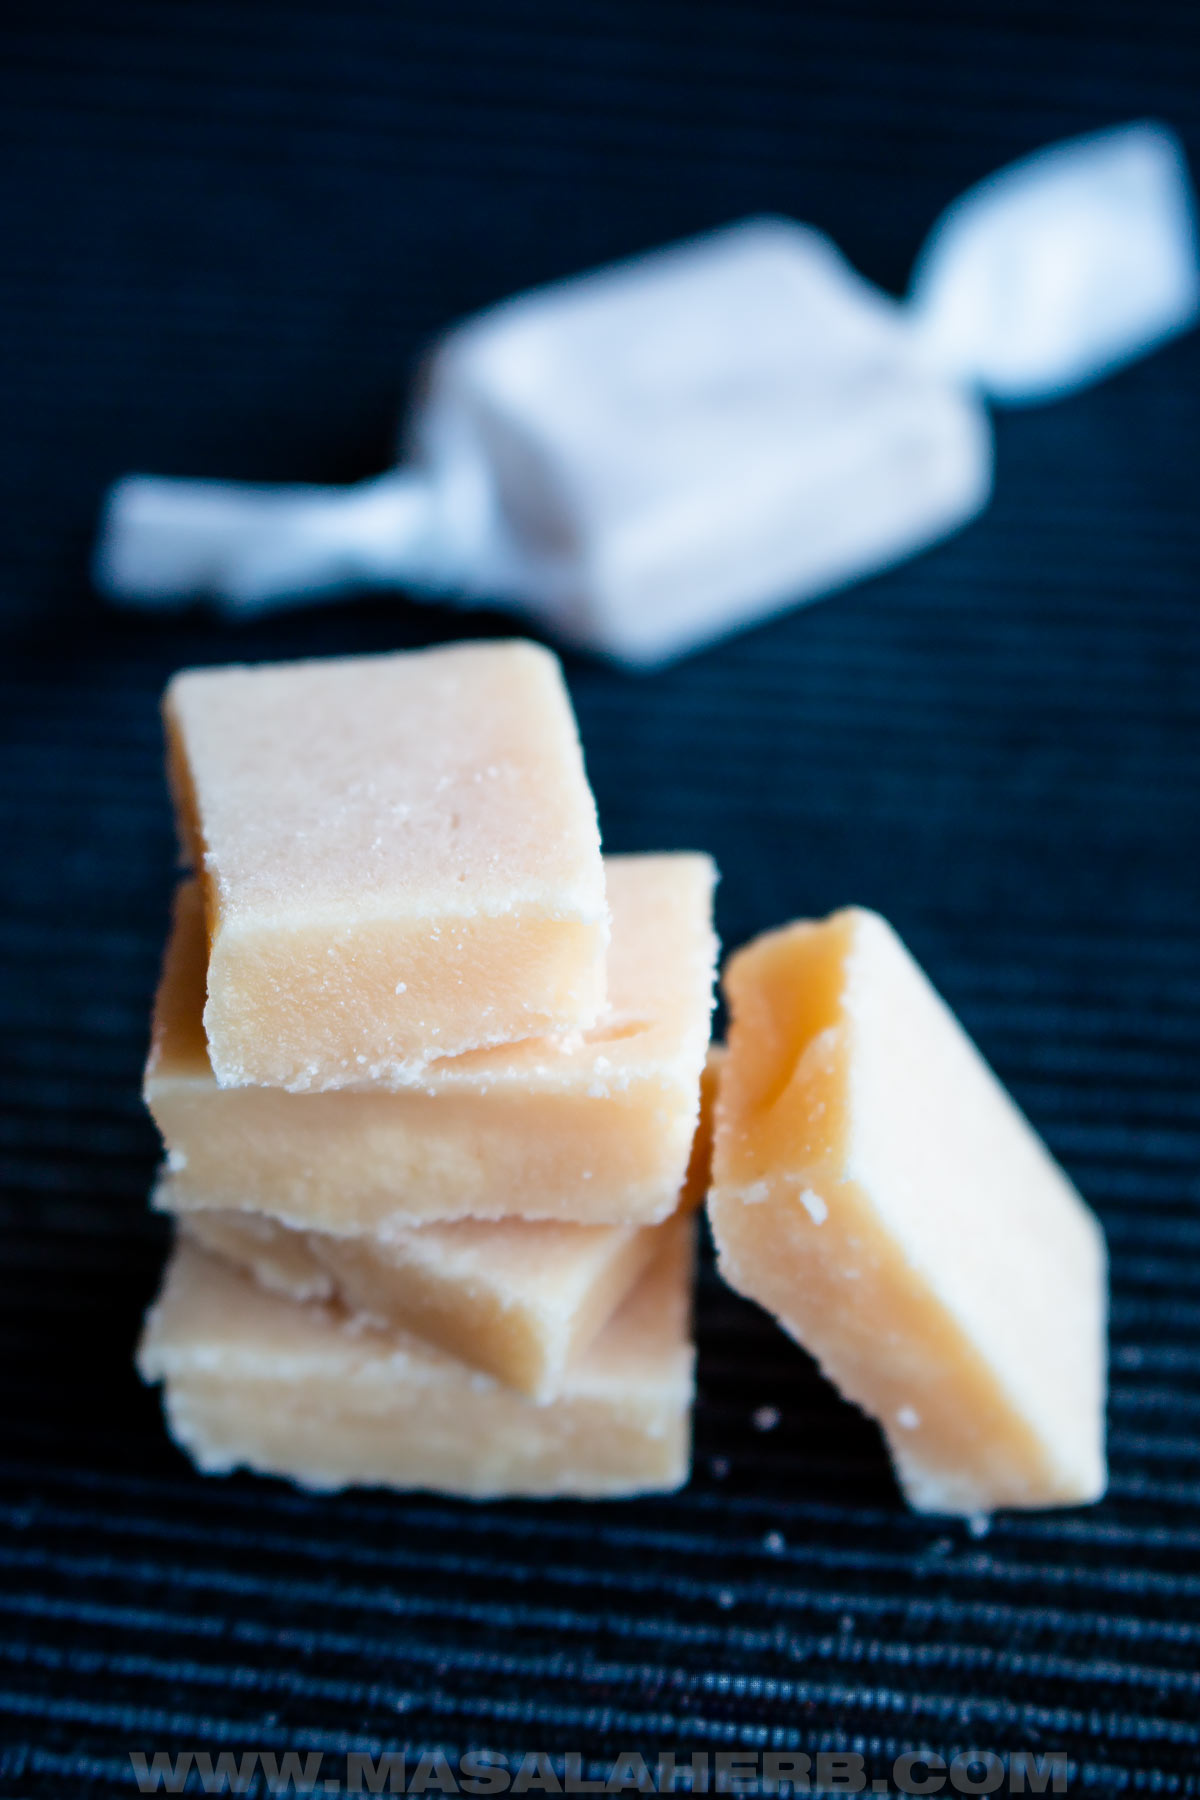
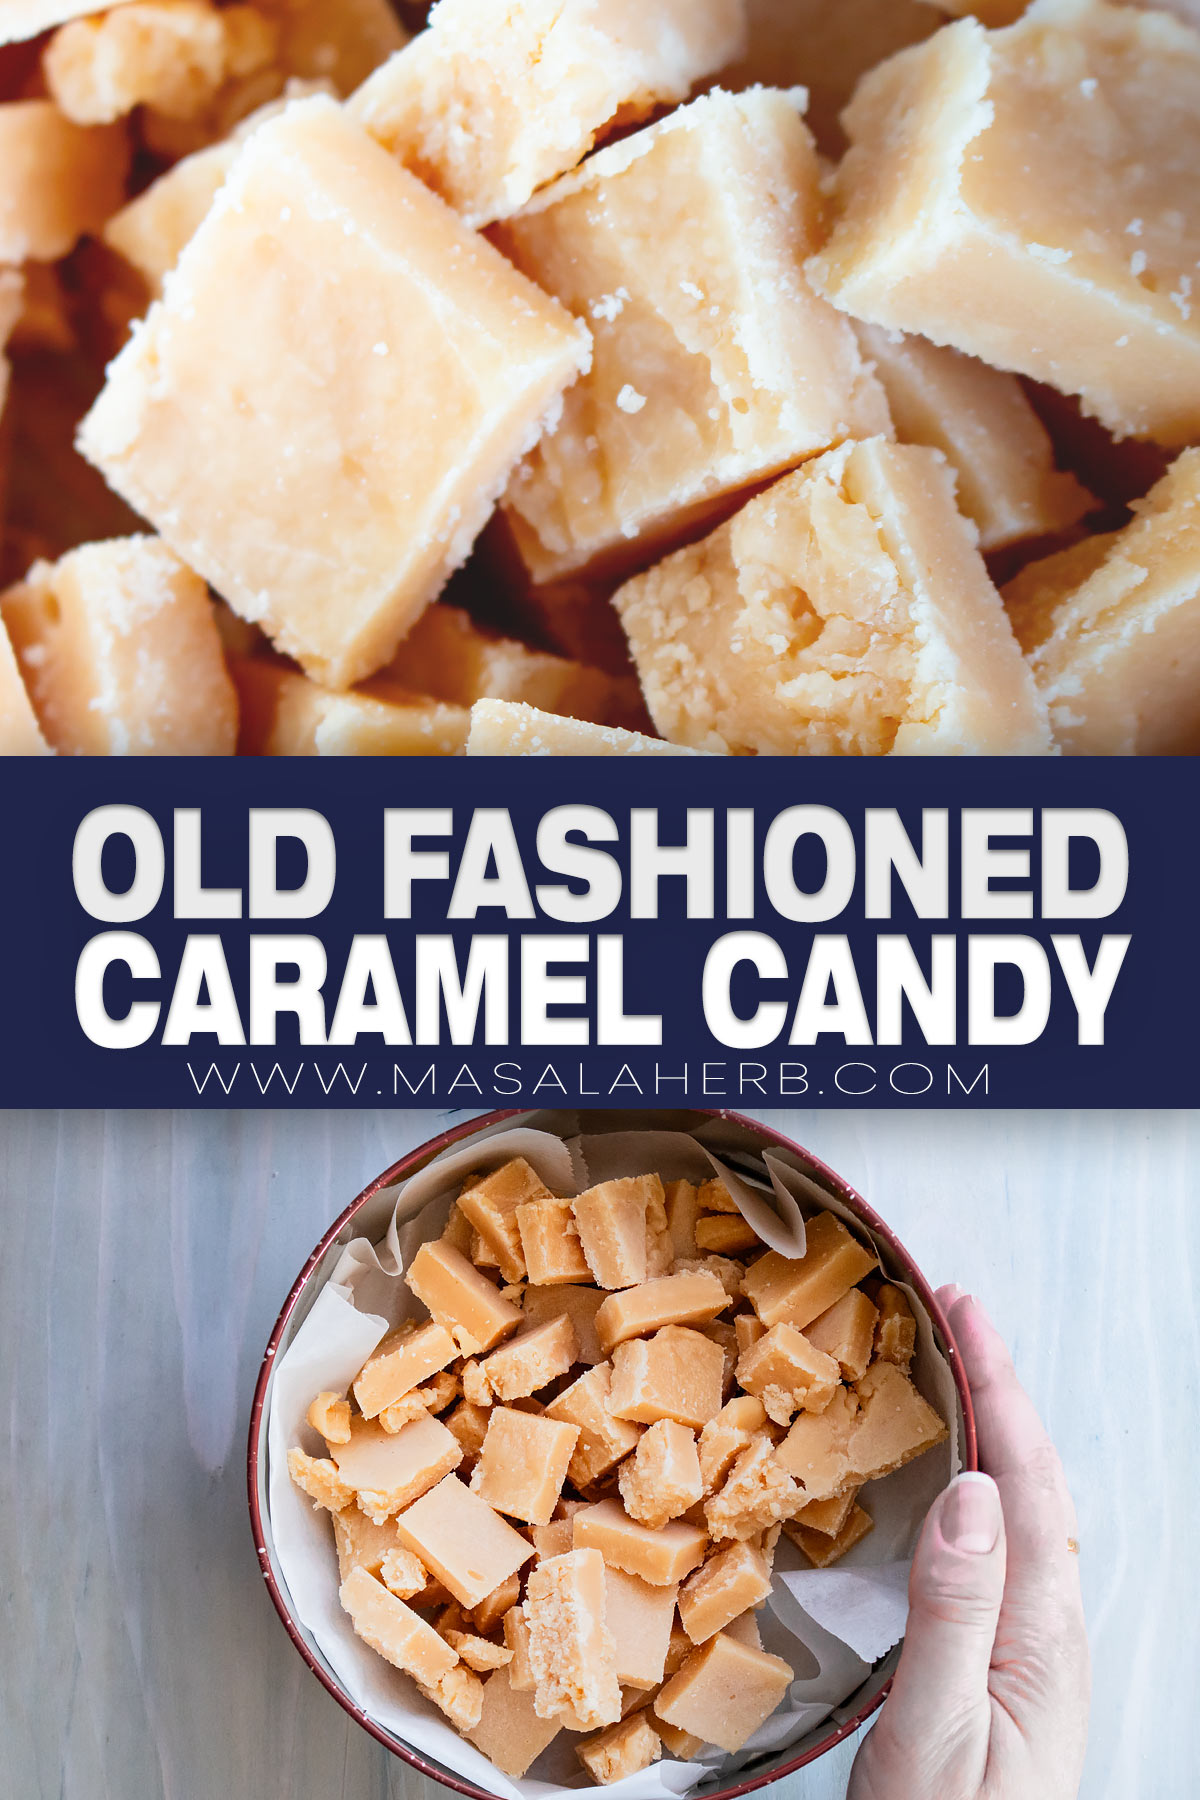
When the caramel is thick, you get to cut it into desired shapes.

📖 Recipe

Old Fashioned Caramel Candy Recipe
Instructions
- Pour milk and sugar into a pan and heat up.2½ cup Milk, 2¼ cup Sugar
- Mix while the milk and sugar are heating up over medium to high heat.
- Bring to a rolling boil and take back to medium heat.
- Stir occasionally while the milk and sugar get reduced.
- At the last stage, the milk, and sugar will get frothy and thick. Just keep on stirring over a medium heat setting while the ingredients are getting thick and darker.
- Reduce and stir cook until you are satisfied with the color of your caramel.
- Take from the heat and quickly pour liquid caramel over a buttered parchment paper. You need to be fast because caramel thicks quickly.1 sheet Parchment Paper, Butter
- Swiftly spread out the caramel as good as possible and leave it to cool for about 10 minutes.
- When the caramel can be touched without you getting burned, you can go ahead and cut the caramel into a desired size and shape.
- Either wrap your caramel individually in parchment paper or store them in a tin box lined with parchment paper.
Notes
- I use a large skillet to prepare my old-fashioned caramel so that it reduces faster and the caramel gets formed within 30–40 minutes.
- I use normal milk. I recommend using a milk which contains enough fats, or else the caramels won't shape the way they should. Don't use low-fat milk.
- I used regular sugar, but you can use brown sugar too.
- You may add flavors to your caramel with the other ingredients. For some ideas, see in the post.
- Keep in mind that caramel is super hot, so be careful and don't burn yourself!
- My grandmother would roll the caramel into balls. I think spreading out and cutting the caramels is easier and less time-consuming.
Equipment
- Large Saucepan (a reader pointed that out in the comments)
Nutrition
Storing
My grandmother would shape her caramel into balls, and she would simply keep them in a tin box lined with parchment paper.
I do almost the same, just that I cut them into squares to save time.
You can also cut some parchment paper squares or waxed paper and wrap the caramel candies into the paper by twisting the ends.
Another idea is to get candy wrappers, but those tend to be made of plastic and that's not very environment-friendly.
The caramel candy can last for up to 2 months in a cool and dry environment, away from direct sunlight.
In a tropical climate, I recommend keeping your old-fashioned caramels in an airtight container, and you should consume them within weeks.
If you want to extend the shelf life, you can do so by keeping your caramel in the fridge.
Variations
You can enhance your caramels further by adding any of the following ingredients:
- a tablespoon or two of butter - for a richer flavor and smoother consistency. The more you add the chewier they get.
- thick sea salt - for salted caramel
- red chili pepper flakes - for fiery caramel candies
- chopped hazelnut or almond pieces - to add crunch to your hard candy
- vanilla extract
More Recipes like this
- Candied Almonds
- New Year's Marzipan Pigs
- Key Lime Pie Truffles by infinetaste.com
I don't know why but it became grainy. I was using soft brown sugar, can I not use it? I don't think it's the recipe, it's me but I don't know how 😭
Hi Choco. How grainy did it get, a little or a lot? It could be the butter, the sugar, or the heat level used. But you can still use it, not matter how grainy it is, it's still edible. It's just the texture will be a bit different, that's it.
I am so grateful to you for this recipe, for a really long time I've been eating nothing but white rice because of a really bad economic situation and thanks to you with just a little bit of sugar and milk (which are the only two remaining things I have) I made something that makes me think that it's going to be okay, eventually. May all your wishes come true, all blessings be bestowed upon you and that you have your favorite meal soon. Thank you.
Hi Alex, I'm so sorry for your situation. Things will look up again soon, I wish it to you. If there is a way that I can help with budget-friendly recipes, for example, please let me know. I will try to create more budget-friendly recipes and collect some frugal ideas from my Food blogger friends.
My mother and grandmother from the Austrian alps made this too. It’s very similar to the Mexican Leche Quemada. So interesting.
I didn't know about Mexican Leche Quemada. Thanks for sharing, will look it up.
If one was to add butter to this recipe when and how would one incorporate that.
Hi Donita, I haven't tried it, but I think you can add the butter when you are heating the milk so that the butter melts in.
Hello!
When making caramel (not this recipe, but in general)you would add the butter at the end adter the cooking....there isn't moisture in it so it just mixes right in and doesn't affect the crystalization.
I love making caramel, I look forward to this recipe!
Made this with cane sugar and whole milk tasted amazing i halfed the recipe.easy too make i loved it
Awesome, thanks for sharing Mel!
Hi im excited to have found this recipe. Thank you for sharing. I have a question, is the candy finish like a sugary fudge or gooey carmel. The one my mom aunts and mamaw made was a sugary fudge like one. Cant wait to try recipe today.. Wish me luck 🍀 lol~~
Hi Anita, this caramel candy is simpler than that, it's a hard candy, so it's neither gooey or fudgey. It's an old fashioned hard caramel candy.
What happens when you don’t add enough sugar?
It won't candy soon enough. It's just milk and sugar so you would end up stirring and cooking it down longer and it wouldn't be less sugar at the end anyway.
Look, I don't know if it was just me being the terrible cook that I am but, this was seriously hard to make and it overflowed 2 minutes in and got everywhere. And, when I say everywhere, I mean EVERYWHERE. This may not be the recipe's fault but still. On a positive note, on the edges of the pot, there were chunks of DELICIOUS caramel. It was sweet and chewy and soft. If there was any left after my "cleaning," which there was not, it would not have lasted a minute. Overall, it was a pretty good recipe. but you may want to change the medium saucepan to large saucepan.
Hi there, I'm sorry that happened to you. Working with moderate heat is definitely a key for success and yes caramel can be tricky. You can't leave it cooking alone, you need to stand at the side and stir and keep an eye on it. Control the heat and the more you stir the better the caramel turns out. The larger the saucepan the better, you are right. I will mention that more clearly in the post. That said, I thank your for sharing your experience, it will be useful to others.
Thanks for posting this. My mother used to make this and I never got the recipe from her before her passing. I can remember stirring many batches at the stove.. She only made it in her cast iron skillet and tested readiness by dropping tests drops into water. For her it had to hold together in just a certain way or it wasn't ready. She added butter and vanilla to the mix and us kids would break up American walnuts to add in at the end before she dumped all into a buttered large dinner plate to cool.
Been looking for this for a while. Thanks, Jamie
You are welcome Jamie. 🙂
Looks delicious! I can't wait to try.